Create Custom UI Agent
This guide shows how to create a Custom UI Agent using JSObject in Appsmith. This approach allows you to fetch data, display it in a modal, and take actions based on user input.
-
Open your Appsmith Agent and connect to the necessary datasources.
-
Create a new query to fetch the relevant data.
Example: If you want to fetch a Zendesk ticket, create a query to get the ticket by ID and set the ticket ID as:
{{this.params.ticket_id}}
this.params.ticket_id refers to the dynamic ticket ID passed to the query at runtime.
- Navigate to the UI tab, and drag a Modal widget onto the canvas. Add the necessary widgets to the modal based on your requirements.
Example: If you want to display the ticket issue summary, drag two Text widgets onto the modal.
- Set the onSubmit event of the Submit button in the Modal to create an issue when the button is clicked.
Example: To create a Jira ticket when the submit button is clicked, you can run the create_jira_ticket query and show a success message on completion.
- Create a new JSObject to handle the logic of setting the modal values and opening the modal.
Example: To display the modal with the ticket summary and description before creating an issue, create a JSObject function like the following:
export default {
    async showSuggestedAction(summary, description) {
        summary_input.setValue(summary);  // Set the summary text
        description_input.setValue(description);  // Set the description text
        showModal('ActionModal');  // Open the modal
        return "A modal has been opened with the suggested action for review.";  // Return confirmation message
    }
}
- Create a new query to create or update the data after the modal is submitted.
Example: To create a new Jira ticket, create a query using the create_issue command and set the summary and description from the modal input values:
summary: summary_input.text,
description: description_input.text
- Navigate to the Chat Query, update the system prompt. This allows you to automate ticket handling and task creation.
Example: Update the system prompt to guide the system in fetching ticket details and creating issues. Add the necessary function calls to integrate ticket fetching and Jira ticket creation.
Assist customer support teams in resolving Zendesk issues by fetching the ticket details, understanding the issue, consulting documentation, suggesting a clear response, prompting the user to send the response via Zendesk, and recommending Jira ticket creation for the engineering team. Fetch the Zendesk ticket, understand the issue, consult documentation, suggest a response, prompt the user to send the response via Zendesk, and recommend Jira ticket creation for the engineering team.
- Add the necessary function calls to the chat query.
Example:
-
fetch_ticket: Fetches a specific ticket from Zendesk based on the ticket ID. -
jira.createIssue: Opens a modal to show the summary and description for creating a Jira ticket.
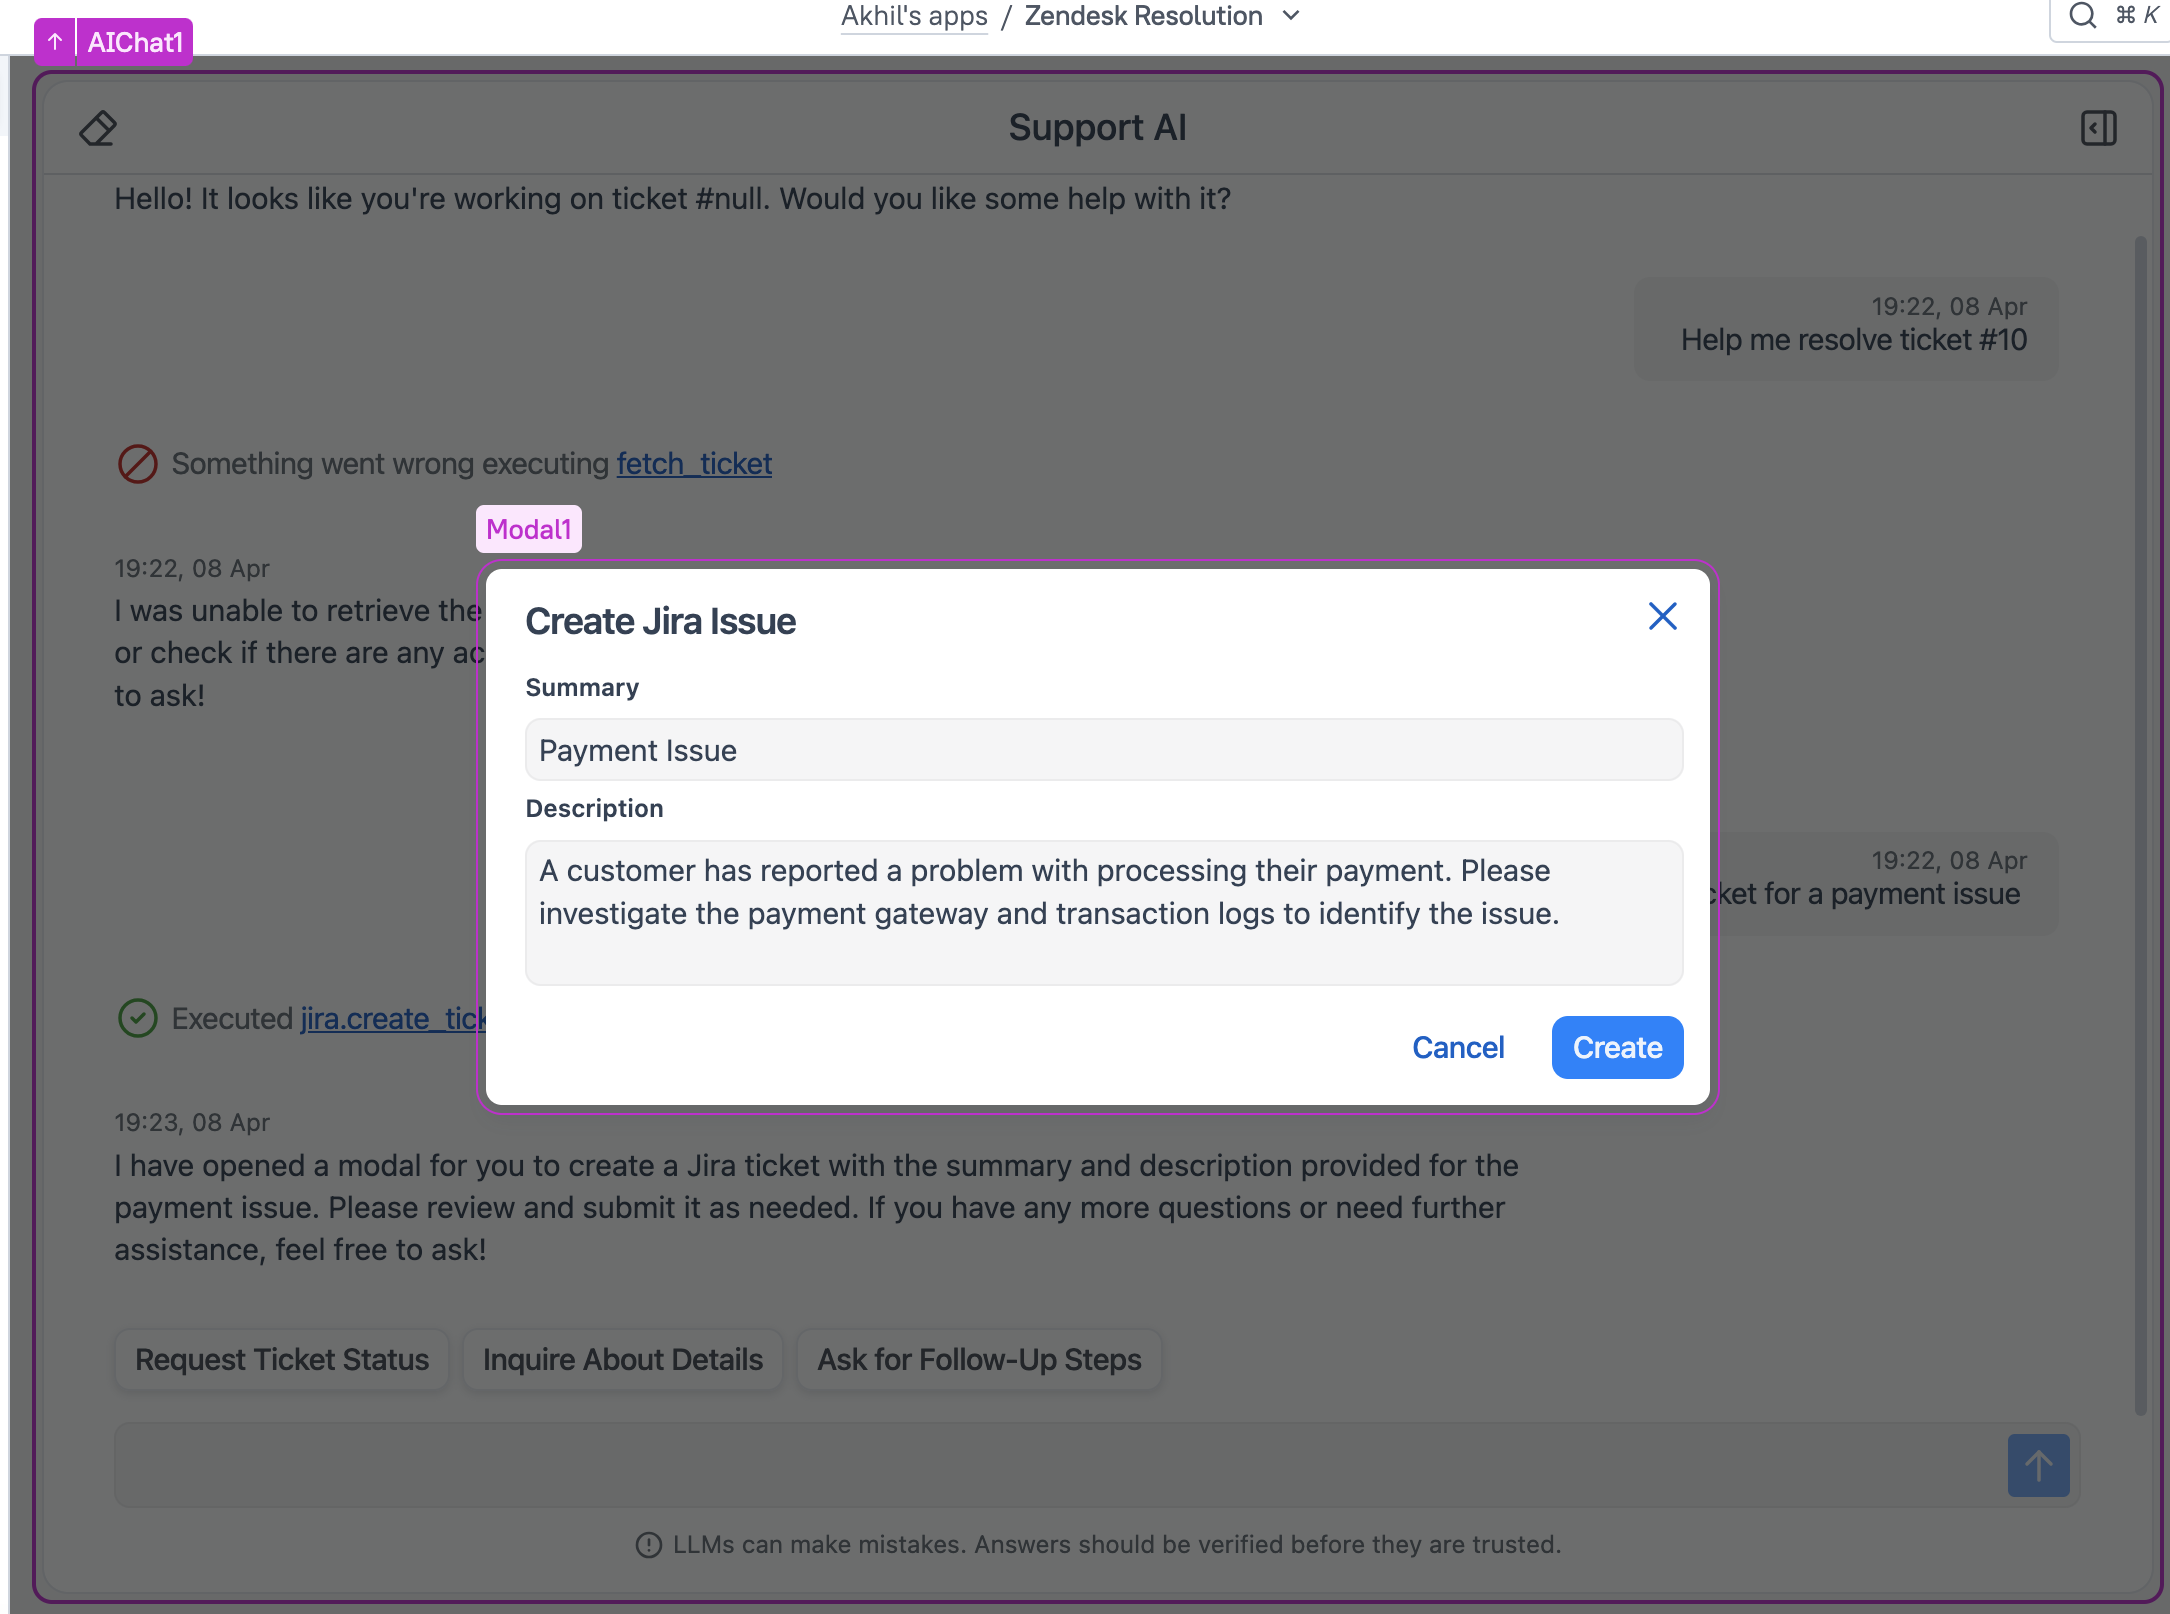
Now, when a user prompts "create a new ticket," the Modal will display the summary and description of the ticket. Once the Submit button is clicked, a new ticket will be created.